Manual Webcamconsult
Part 2: Dashboard
This overview is complete, i.e. applies to all roles together. Which parts you see depends on which role you are assigned to: Organization Administrator, Division Administrator or Consultant.
The "my Organization" menu is largely intended for the Organization Administrator. In larger organizations, this is often an application manager. The institutions are configured there, and departments and employees (practitioners and department managers) are created. Payment settings and widgets are also created and managed for placement on your website or portal.
Support (paid subscriptions)
Meet your client

My organisation
In this block, you can manage various organization specific settings of your webcam consult application.
Here you can add your profile information:
- General information such as name and phone number; you can change your password for the online consulting room;
- Upload a profile photo/avatar;
- Assign a department and assign a role.
Here you will find information about your subscription (as seen in the summary page)
You can also test your network and hardware here to see if it meets all requirements for doing webcamconsults.
If needed, you can prepare your desktop / laptop browser for screen sharing. In some cases (older browsers) you will need to install a plugin. Currently only a plugin is available for Chrome and Firefox. After installing the plugin, you must restart your browser. For Internet Explorer 10+, the plugin will automatically download at the start of your first consultation.
Would you like to use our widgets for walk-in consultation or for bookings? This can be done by creating a widget; This generates a specific iframe with the webcamconsult walk-in application. Your website administrator can place this widget on any desired page in the desired formatting, so that visitors on your website immediately see who is available for direct online walk-in consultation or for bookings in the )near) future . Each consultant/therapist can indicate in his own online consulting room whether he/she is available, or can plan availability in his/her calendar (see "Availability" under "Agenda management").
What is being shown?
On the first page:
- Name of the widget
- Which divisions to show in the widget
On the second page:
- Widget text: This is specific information about the walk-in consultation hours
- Widget text in the case of absence of all consultant
- Title and text colors can be specified.
- Preview: Show how the text is displayed in the iframe.
On the third page:
- Here you can indicate what information the patient / client needs to fill in before entering the online waiting room.
On the fourth page:
- Here you can optionally upload a logo and background image and if desired customize CSS for a better integration with your own website.
You can finish by saving the widget.
The widget can be placed on any (html) page of your website (hence also behind any login).
Each consultant/therapist can indicate in his own consulting room with an on / off button whether he is available for walk-in consultation. When the button is on, the consultant/therapist will be visible within the iframe section. A visitor can directly entered the waiting room of that consultant/therapist, after entering if required e.g.name and date of birth as well as acceptance of terms and conditions. The consultant/therapist will see walk-in clients in his online waiting room just like other clients. Walk-in clients are recognized by a yellow corner mark.
Do you use Wordpress for your website?
You can install the walk-in consultation system even easier on your website with the Wordpress plug-in. These can be downloaded and installed via https://wordpress.org/plugins/webcamconsult/
You install the plugin as usual in WordPress, after which you can manage all walk-in consultation widgets and place them anywhere on your website.
Your client does not have to install a thing, he visits your website and enter the waiting/consulting room of the person he wants to speak. Very easy and convenient. A camera and microphone are the only requirements. Do you use another CMS system? Please contact us and we will be happy to assist you.
Enter your company name here and upload your logo, which will be placed at the top left of each screen. Make sure that your logo's image is not too large (ideal size: 180 by 50 pixels). An oversized image will be automatically resized, probably resulting in unreadable text (eg name).
You can indicate whether you want to strictly separate departments (divisions). Strictly separated departments means that treating physicians and Department administrators can see only their own departments (clients, appointments).
Organization Administrators can see everything.
Attention! If you have strictly separated departments then it is automatically possible to make arrangements between clients and departments. This will appear as an option in the form for appointments.
If a client is invited for an appointment with a Department than the link in the invitation e-mail leads directly to a "department waiting room". All consultants that belong to that Department can then pick up
the client for a consult.
Also on this page you can define the form of address of the therapists / consultants in Dutch, English and German.
The Contact Information is the information that appears in the IOS/Androis Apps.
The API Key is only required for connection between webcamconsult and your own system.
It is also possible to anonymize appointments after specific time if required by (patient) information security policy.
If remote support is required, you can grant access to webcamconsult tech support to remotely monitor and access your system.
Advanced settings
These settings are set by the Organization Administrator, often in consultation with Webcamconsult support.
Strictly separated departments. If you select this option, clients are strictly separated between departments. It is therefore possible to make agreements with departments instead of only individual practitioners. PLEASE NOTE: if a client is not added to a department, he will no longer appear, except for organization administrators.
Strictly separated clients. If you select this option, clients are strictly separated between practitioners. This means that only specific practitioners can see specific clients, only agreements between that practitioner and his 'own' patients are possible.
Consolidate and anonymize appointments: If you check this option the client information will be removed from all appointments older than the set number of days, so the appointment will be de facto 'anonymized', only the time, date and consultant information will remain available. OP: If you anonymize and 'consolidate' an appointment, there is no longer any way to retrieve the information about the client!
Allow remote support access: This option allows the platform administrator, or tech support to log in as one of the employees of the organization. This can be useful if there is a problem with the system, or if it is necessary for the administrator to "look over the shoulder".
Use web for android: When this choice is selected, an app is no longer searched for on android phones, but the consultation is opened directly in the browser.
Use web for ios. When this choice is selected, an app is no longer searched for on iPhones, but the consultation is opened directly in the browser.
Use new design consultation rooms. In December 2018 we updated the design of the consultation room for the client and the consultant. Check this option if you want to use the new design
Allow file sharing. File sharing is useful, but there are some minor risks, especially if the practitioner and the client don't know each other. There is a chance that the client or practitioner will send malware.
Allow screen sharing. Turning on screen sharing can be very useful, but there are some limited risks especially if customers and consultants don't know each other, there is a chance that wrong or disruptive content will be sent or displayed.
Send me a message if something goes wrong with the mail. This option ensures that a message is sent to the department manager. If that is not available then a message goes to the organization administrator. In the mail the error message is mentioned, and the reason for, for example, the refusal. You can then re-enter the appointment with a different client email address.
Use explanation animation: When this is selected, an animation will be shown in the waiting room. A video file name and a still frame will be specified by Webcamconsult support in consultation.
Use evaluation. If the evaluation is selected, an iframe with a survey will be shown after the consultation that the client can complete. The doctor can see this. The questionnaire is entered via google forms or a similar service.
Use of the questionnaire: If the questionnaire is selected, a questionnaire is displayed in the waiting room that the client can complete. The doctor can see this. The name of the questionnaire is specified by Webcamconsult support in consultation
Use of disclaimer: If this option is chosen, a disclaimer will be shown for the waiting room not accepting the disclaimer will prevent access to the waiting room. The file name will be specified by Webcamconsult support in consultation
Online payment settings
It is possible to activate a payment function for appointments and consultation hours and to set rates for online payment before you can enter the waiting room.
This is a separate item in the "my organization" menu.
Organization administrator activates payment function and sets rates and VAT rules depending on the country and nature (business / private) of the client. Department manager can determine per appointment whether online payment applies and what rate.
For now the global payment providers Paypal and Stripe are supported. Your customers can then pay via their Paypal account or as a guest with a valid credit card. If you do not have a Paypal account yet, you can create one very quickly via https://paypal.com. You then link your own bank account or credit card to the desired e-mail address that you enter under Paypal in the relevant section of battalities.
To use Stripe for consultations you must have an account with Stripe. If you have an account, just enter the 'keys' that you find in your dashboard. If you do not have an account yet, go to https://www.stripe.com
If you need another payment provider for your online business, you can contact us anytime. We can provide integration at reasonable fee.
Set widgets
You can also set widgets via "my package". For an explanation see the part of the manual that is about my organization - my package.
Here you can easily create, edit and delete divisions. Divisions are needed to assign users to which belonging to those divisions/departments.
Here, as an organization administrator, you can add, change, and delete users. If you create an user, he/she will automatically receives an email with an access link, where he/she can create a password. Note this password links are only temporarily active.
If you want to use the option to invite additional participants in addition to your client, you must first create groups under the "Groups" tab. For example, for a medical practice, the groups "Family" and "Caregivers" could apply. In the "External Participants" menu item, you can then enter the external participants and assign them to groups.
Agenda management
This menu section will usually be used most by the Division administrator. Here, clients contact and appointment information is kept. In case you have a software link with your client-, EHR or CRM system, this menu is usually not available.
Here you will find an overview of the appointments scheduled today. Each division / consultant or therapist is clearly displayed in colors.
In the consulting room you will see the video screen with which you will be able to do the consultation with the client. Upon starting the consultation, you must give permission to use the webcam and microphone (depending on the browser used, you can set your PC to remember this). It is possible to maximize the image.
On the right you can see a clock, which also tracks how long the consult with the client runs.
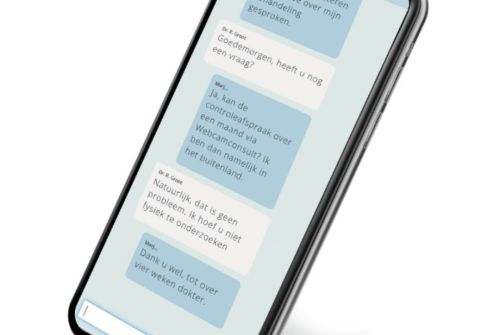
On the left (in desktop mode) you will see a chat window. This allows you to exchange messages with the client using your keyboard. Always convenient if there is no sound. Note that patients can only chat back from the desktop app right now.
On the far right you can see which clients are waiting in the online waiting room. A green corner means that the client has arrived on time, one red that he/she is late. A yellow corner means that it is a visitor of the walk-in consultation. You can now click on the desired client (the exact time of the appointment is shown), after which he/she is transferred to the consulting room. The client must also give permission to use the webcam and microphone on their device and then the consultation can start. The name of the client is visible on the name card in the upper left part of the screen.
During consultation, you can minimize the browser screen to e.g. consult or update your patient/client file.
You can also use the chat window to send text messages, but also internet links (url).
It is possible to send files during online consultation. You select the desired file from your hard drive and send it directly (only available during the current session) or by mail to your client.
Please note that the files are only available for download during the active consultation. Upon completion of the consultation, they will be removed directly from the server.
In addition to file sharing, you can also share your screen with your client. This requires that you first install a plugin for your (Firefox or Chrome) browser. Please refer to "My Package" or "Support" in your dashboard.
Click screen sharing, after that, there will be an additional small video screen visible, your client can enlarge this by clicking on it. This way he/she can look at what you see on your screen. This can be useful for example if a doctor wants to show the results from a MRI scans, or an accountant would explain the reports to his/her clients.
It is also possible to add an additional person to the ongoing conversation.
If, in addition to your client, you have invited more than one person, a small image on the video screen will appear on the current video feed, which can be expanded by a mouse click.
If the consultation is over, click on "End consult" that is on the client's card in the left upper part of the screen. If desired click on the following client to start the next consultation.
After completion of the consultation, the patient will receive a notification screen with information how to make a follow-up appointment (usually telephone number) if indicated by their consultant or doctor.
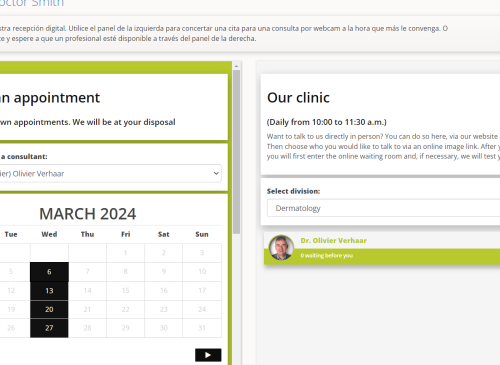
Here is a list of the appointments made in your division. You can also enter new appointments here. If you click on the "New appointment" button, you can select a consultant/therapist, enter a client and appointment by selecting date and time. As a client number, use the number under which the client is registered in your own system (EHR, CRM, etc). Immediately after you save the appointment, an email will be sent to your client containing the access link. On the day of the appointment, a reminder email will be sent to your client. The access link only works for a limited time: from one hour before the appointment up to one hour after the appointment time.
It is also possible to create a group consultation. For this, you need to have created groups and participants under "external participants" in the dashboard. For more explanation: see the relevant items in the manual.
If you have created external participants, you can make an appointment with a client and invite additional participants. It is necessary that the client is present during the online consultation first, otherwise additional participants cannot enter.
If you (or your Organization Administrator in "my organization) have strictly separated departments then it is automatically possible to make arrangements between clients and departments. This will appear as an option in the form for appointments.
If a client is invited for an appointment with a Department than the link in the invitation e-mail leads to a departmental waiting room. All treating consultants who belong to that Department can then pick up the client fo a consult.
Paid consults
For every new appointment you can choose whether it is a paid or free consult. If paid, you can choose between the tariffs that organization administrator has configured for your organization (menu "my organization). The client will receive a mail (you can edit the text yourself) and before he will enter the waiting room he will be asked to pay online.
iCal events in the appointment mails
In the invitation mails to clients there is an option to capture the appointment in his/her agenda (e.g. Google Calendar).
It is possible to meet immediately online with the quick consultation function. Add the participants and click enter. You start directly in the consulting room and not in the waiting room.
The availability of a practitioner or consultant is entered and monitored here. It works the same as appointments, but here the available time is entered in the diary of the relevant practitioner for two purposes:
1. for walk-in consulting hours.
For example, January 21, 2020 from 3 to 4 pm; or every Monday morning from 9 to 10. The widget uses the entered availability to display the relevant practitioner on the web page (s) where the widget is placed.
2. For bookings by clients or patients
The availability is translated into timeslots. For example, with a consultation duration of 20 minutes and 10 minutes between consultations, 2 hours of availability is converted to 4 time slots, which the visitor to the web page (where the booking widget is placed) can book for an appointment.
In this menu item, you manage contact details of your clients. Only initials, last name, date of birth and e-mail address are required.
It can be useful to check if a client was previously entered in the system via the Clients functionality. Simply click on the calendar icon behind the name to create a new appointment, so you do not have to fill in your client data again. You can also create a new client here and then press the "Create appointment" button. In all cases, a new appointment will be emailed to the client with an encrypted link. With this link, the client automatically enters your online waiting room, but only within a time range (one hour before (date + time) to one hour after) around the appointment. Outside this period, your patient / client will be notified that they are too early or late.
If you want to use group appointments (for example, in addition to your client, family and home care staff can join the online consultation), you can enter the required information here (same as with a client) and assign the persons to a logical group that you previously created via the "Users" tab Groups.
Client texts
The Webcamconsult system displays announcements or messages to your clients at different times. In this menu section you can customize these messages to your own preference.
You can set up these notifications after which they appear to in the online waiting room for waiting clients. This is useful e.g. if you are running late 10 minutes, or want to inform clients in the waiting room otherwise. You must not forget to delete the message afterwards.
Your client will receive several notifications before and after the webcamconsult. These can be customized as desired. In this menu item you can change the message "You are on time". In addition, you can use special codes in the text that are converted for your client to useful date and time data.
"|afspraak_welkom_vanaf|" represents the start time from which your client can wait in the waiting room. This is usually half an hour before the actual appointment.
Your client will receive notifications about appointments by email. Directly as confirmation of the appointment and a reminder on the day of the appointment, the client will receive a direct link that gives him access to the waiting room (from half an hour before the actual appointment). The contents of (standard) messages can be customized per division. You can adjust subject and content of each email, in which you can include useful codes in the text to automatically fill in text depending on the appointment. Examples are shown on the right. Make sure that the codes remain intact so with * | for the code and | * behind the code.
There are some browsers in use that are not suitable for our video streaming standard. Do you have an old version of Internet Explorer (9 or less) and you are not allowed or able to install Chrome or Firefox, we recommend to download the standalone webcamconsult desktop application:
The application can be found here: https://webcamconsult.com/images/downloads/webcamconsult_setup.msi
In this application, you can simply sign in with your Webcamconsult login credentials, after which all the features of the dashboard and consulting room are available, and you can do your webcamconsults.
This application also allows your client to enter a PIN in order to access your online consultation at the right time. In the desktop application, you can click "use pin code" and enter your PIN. If no PIN is used, you can copy the link from the email and paste it into the webcamconsult desktop application. You can include the PIN in the standard email invitation.
Since version 2.0, each appointment has not only a link with an embedded token, but also a PIN, for example 4386. This is by default not included in the default mails; You can include PIN though by including the shortcode *|pincode|* in your custom text. Suggestion: Add the link to the webcamconsult desktop application for your clients: https://webcamconsult.com/images/downloads/webcamconsult_setup.msi
Via the menu in the IOS and Android apps, your client is able to view your contact information. Here you can manage this contact information.
Support
In this menu you can contact us and ask a question regarding the use of your Webcamconsult application.
On this page you will find screen sharing extensions for google Chrome and Firefox. It is recommended to install them before doing any consultations. The respective links will bring you to the screen sharing extensions in the extension libraries of Chrome or Firefox.
For users of Microsoft Internet Explorer 10 or higher, the plugin is installed automatically at first use of the hardware test (see link at the upper richt corner of your webcamconsult site.
Safari on Apple Mac computers/laptops doesn't support screen sharing. And unfortunately this feature is also not available on smartphones and tablets.
From here you will be directed to the contact form on our website. Here you can go for sales-related questions or submit a request to receive further information or make an appointment with the webcamconsult staff.
Via this menu item you will be directed to our support ticket system. Here you can, as a webcamconsult subscriber, ask questions about using our service. Regarding malfunctions/bugs or problems: You will be asked to specify as precisely as possible the problem you encountered, for example, what equipment and software you were using, whem the problem occurred. The better the description and information the better we can investigate and provide a solution. You will be automatically informed about our progress through our ticket system.